Long overdue for an update, I have these backlogged photos of my journey towards building a better refrigerator, and I feel I need to get these published so I can pursue further writing.
The last nine months or so in my shop has been productive, in my opinion, and I have turned out a great number of variations on the simple device commonly called a domestic refrigerator. I’ve bent a lot of copper, gone through a fair amount of propane refrigerant, and done a great deal of thinking. Although seeing an idea come to life fills me with much satisfaction, it is dreaming up the next big idea which gives me the most excitement. You’ll see that I have gone through an absurd number of iterations and that each one followed a line of thinking which sought to test and evaluate each for its suitability in the pursuit of worthy technology for a rugged, reliable, and efficient refrigerator which could serve domestic purposes for generations. I’ll start where I left off in Beginning the Modular Refrigerator.

From this photo, you can see there was some thought put into the organization and layout of an experimental modular unit. Ultimately, this system would be plagued with capillary tube problems, as I hadn’t yet determined the correct bore and length for r-290 in a system of this size. Capillary tubing was pretty new to me at this time. I made a lot of foolish errors, both in my execution of the device and my description of the problems on my YouTube channel. The compressor was over-sized, and the glycol mix I was using was too strong. The setup was designed to be inserted in a mini-fridge with a hole cut in the top. I’m still using the base, insulation, and control panel, but the rest has been retired.

This is a view of the copper evaporator, without the tank on it. This evaporator was a lot of work to construct, but nonetheless a joy in that it taught me a lot in terms of careful construction and brazing. I used some stripped thermostat wire as lacing to hold the inner and outer coils together, before I assembled them into one large coil. The evaporator was mounted to a 6″ third steam table pan lid. It was intended to cool a strong solution of of glycol, allowing the warmest to rise to the coil, be cooled and sink to the bottom. The pan was not fitted with fins to increase surface area. The lack of surface area, and the insulating frost which formed on the steel, made maintaining low cabinet temperatures difficult. Experimentation with a Lexan baffle to increase air circulation proved to be helpful, but limited. A small circulating fan was also tried, but again limited.

This was a temporary abandonment of the glycol evaporator for a simple plate coil. A simple serpentine was bent and clamped in between two aluminum plates. This was around the time I figured out an appropriate size for capillary tubing, and the hole set up proved to be quite successful. Cycling was often, and although I am happy it worked well, It was wise to return to a glycol tank.


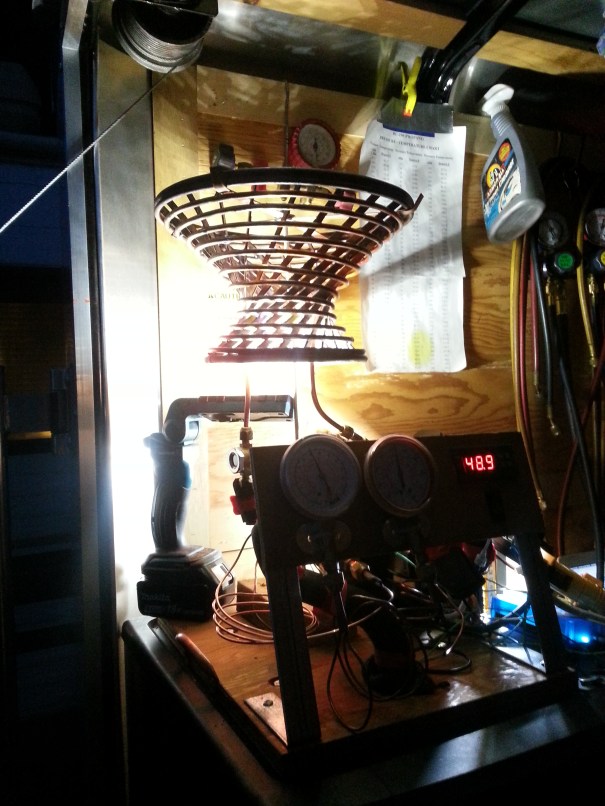
My first attempt at a static condenser. I wanted to eventually make the hole set up round, but I don’t want to settle for a simple cylinder. I got the idea for a hyperboloid somewhere in Montana on a cross country drive from Portland, OR to Portland, ME. I also had to figure out how to construct it along the way. Everything went fairly well, although wrapping the coil onto the copper base structure proved to be exceptionally difficult and I won’t be attempting anything quite like this again. Neat though! The condenser was too small to get much effective subcooling and now serves as a lamp shade. 🙂


I am now using this slightly modified version of evaporator glycol pan. It is a 2″ half steam table pan with several stainless steel fins soldered to its base and sides. This project required buying a metal brake and learning how to solder stainless steel. Proper clamping a warpage was a major issue, but all in all, it has proven to be a success. The copper coil has since been lengthened, and a suction accumulator added. The glycol mix was reduced to a weak solution comprising about 10% propylene glycol. It begins to freeze at around 26 degrees F, and can maintain cabinet temperatures for several hours, depending on thermostat set points.
That’s all the pictures for now, it’s dinner time for me and the cats. I’ll finish off the pictures with another post.
-M.C. Pletcher

Questions or Comments?